DIY flooring for marquees and storage tents
This article discusses the advantages of marquee flooring, and estimates the costs and hire prices for 5 alternative flooring options.
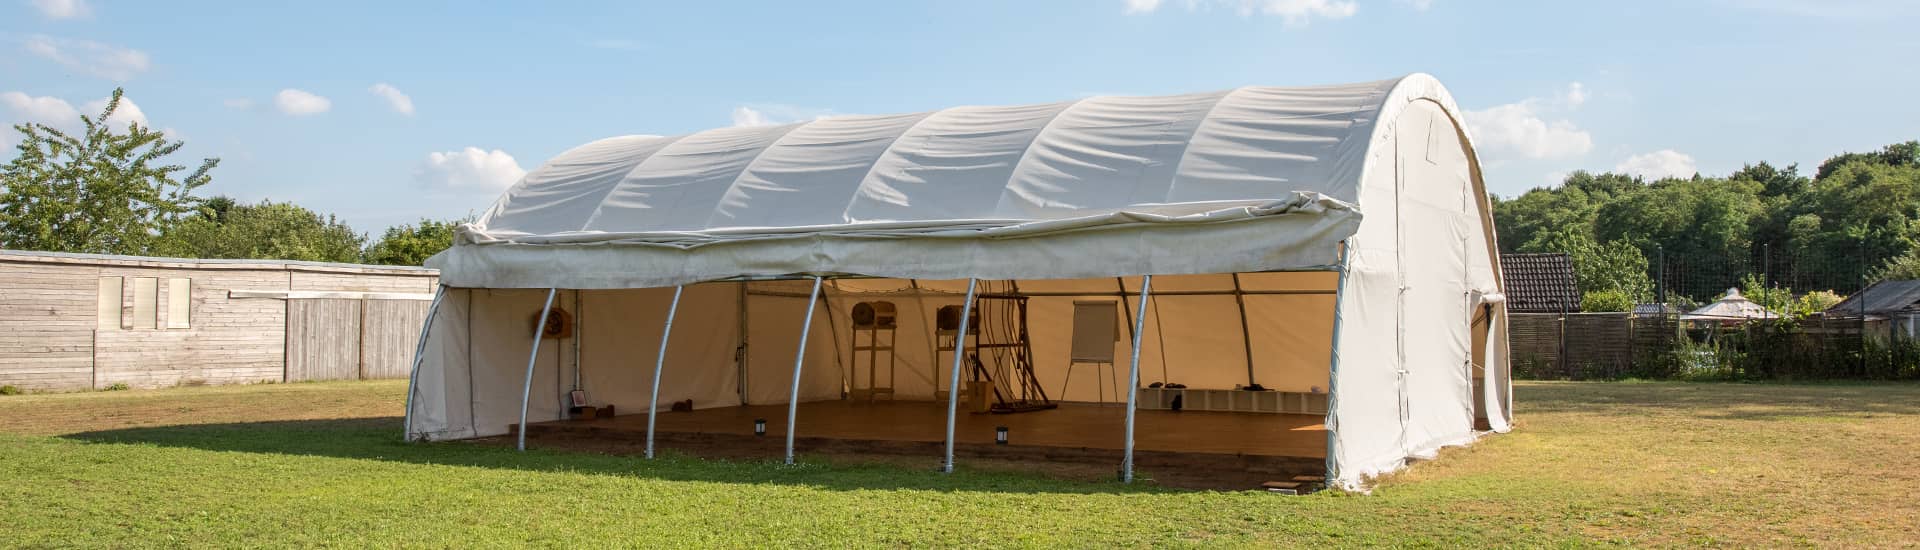
See our marqueesMarquees, storage tents and other large tents allow you to erect four walls and a roof in short time, wherever they’re needed. Marquee flooring isn’t always a must, but it has great advantages. It allows you to transform a cold, wet, and uneven ground into a flat dry surface that is more suitable for both events and storage.
Included in the article are in-depth instructions for building chipboard flooring with either a concrete block foundation supporting timber jousts or a sub-structure made of pallets.
In this article, you’ll find the following tips and information:
Why build a floor for the tent?
Often, flooring isn’t needed for a marquee or outdoor shelter. This is particularly the case if you’re setting up on a hard, dry and even surface. Of course, that isn’t always the case.
For events, flooring is important to ensure that your guests are comfortable. A real bonus is the ability to lay a carpet, which dramatically enhances the atmosphere in a marquee. The safety of your guests is also paramount. Older members of society in particular are at risk of tripping on even grounds.
If the ground is wet, your outdoor event can become uncomfortable at best, and slippery at worst. Flat wooden event flooring with carpet is the best option for protecting yourself and your guests from falling over.
If you’re using an industrial tent or arched shelter for storage, a floor will be necessary for stopping dampness rising from the ground and damaging your stored goods.


What is the best flooring for a marquee? 5 flooring ideas:
We recommend a chipboard floor, which allows you to benefit from the strength and eveness of timber, at a reasonable cost.
To be thorough, we’ll introduce 5 methods for evening out a floor, protecting the grass underneath, and keeping the inside of your venue dry. Each method has its own merits and drawbacks. We’ve also made a rough estimate of the cost for flooring a size 6x4m marquee for each type of flooring.
Grass reinforcement matting
These rigid plastic tiles are designed with plenty of space to allow grass to grow through the plastic sub-structure. The tiles reinforce the lawn, protecting it from damage, and preventing the formation of muddy patches, particularly where cars and light machinery are being parked. Note that these are not suitable for heavy machinery. A further disadvantage is of course, that they do not reduce moisture in your tent.
Tiles cost between £15-20 per square metre, depending on the strength required. For a 6x4m marquee this would work out at roughly £350-500.
Plastic tiles
A similar option is rubber or plastic tiles that form a solid surface. These do have holes, to allow the grass to breath, but are not designed to allow the grass to grow through. These are more stable than reinforcement mats, and because they’re non-slip, they are suitable for events. A huge advantage is the ability to set up tables and seating, and also to protect the grass from a large group trampling on the lawn.
They’re quick and easy to install, and can be put away just as easily. You’ll find that a reasonably flat surface is essential for laying these tiles. Using a shovel to flatten out any bumps, alongside sand or soil to fill holes, may be necessary to level out the surface.
These tiles cost roughly £30-35 per square metre, coming in at around £700-850 to cover the area of a 4x6m marquee. You’ll find hire prices of anything between £6-12 per metre squared depending on the quality of the product, costing between £150-300 for a weekend for a 24 sqm tent.
Coconut matting
Many marquee hire companies use coconut matting for events. This durable material resembles a rustic carpet and is usually laid on a PVC sheet to prevent it getting wet. It is anti-slip and hardwearing. Just like with the plastic tiles, it’s important that the ground-level is flat.
The cost per metre squared is roughly £10-12, or £250-280 for a 4x6m marquee. To hire the same product, expect to pay about a quarter of this cost, between £60-70 for 24 sqm.
Concrete Floor
Concrete is a common long-term solution. When done professionally, you can count on it lasting for years and decades. Laying a concrete floor is not something that should be done without planning and without the required materials and expertise. The finished product is unlikely to last long before it starts to cause issues. This is particularly the case in relation to waterproofing. The floor also needs to be ventilated. While it is usable after a week of drying, it can take up to six months to fully dry.
There are a variety of useful diy guides online that can help you pull this off. The concrete base is obviously the best option for a space that will experience plenty of hard wear and rough treatment, for instance from farm machinery or storing tonnes of items. Apart from the investment in terms of cost and time to build the floor, you may also eventually face the need to dismantle the floor sometime further down the road.
We estimate the cost of building a concrete floor measuring 4x6m at approximately £1500, including the waterproof membrane, shingle and other materials. However it will cost double that if you have a builder do the work for you.
Chipboard
We recommend a chipboard floor as a long-term, dependable option that is comparatively cheap and easy to install. You can achieve a perfectly even floor and lay carpet on top making it ideal for events or for storing medium or light goods. A key advantage of this approach is that the flooring stops moisture from entering the temporary structure, and that it offers ventilation between the ground and floor, to dry out any moisture from underneath. It is much more affordable than a concrete slab, and even costs less than plastic tiles.
We estimate the cost of materials for a DIY chipboard flooring supported by concrete blocks at roughly £1000 for a 4x6m area, or a little under £700 not including the waterproof membrane.
A more budget option is to lay the floor onto pallets, rather than concrete blocks. You save on the cost of concrete blocks and joists. It will however be a greater challenge to achieve a level surface. This is a sensible solution for a building that is needed over the shorter term, as the pallets won’t last for more than a year, even with waterproofing treatment. Read on below for all the information you’ll need to complete this project.
The price of the materials for this marquee flooring option is roughly £500 for the 4x6m event tent.

How to: Building a marquee or storage tent floor from chipboard and concrete blocks
Building marquee flooring in your garden or another outdoor area is an achievable DIY project for 2-4 people working together over a weekend. Erecting the marquee or storage tent is the easy part. You can find video instructions for the assembly of each of our products in our online shop. Just click through to your favourite tent or gazebo for all the details.
To build a chipboard floor, we’ve followed the advice of French DIY experts Comme un pingouin dans le désert translating their advice into English. Photos showing their progress will help you follow the individual steps.
This method requires some craftsmanship and time, but is a solid solution for high-quality hard flooring. If you don’t have that much time, and can afford to compromise on durability, it’s best to jump straight to our wooden flooring made of chipboard and pallets.
Materials you'll need
- Sand (for filling holes in the ground)
- Concrete blocks
- Spirit level
- String
- Ruler
- Timber joists
- Rubber support pads (2 per concrete block)
- Waterproofing membrane (if desired)
- Chipboard
- Hand-held circular saw
- Cordless drill & screws
- Large Rubber mallet
You can plan for the number of concrete blocks that you’ll need, by imagining the placement of concrete blocks in the four corners of the tent (allowing 10-15cm to the tarpaulin), and then spacing the blocks roughly 60cm from another. A 4x6m storage tent requires 40 concrete blocks (10 * 4) to achieve this spacing.
Detailed instructions for building the chipboard floor with concrete blocks
Set up your tent, making sure that the corners are all at right angles to each other. This can be checked by measuring the diagonal distance between corners, which should be equal across both diagonals. We highly recommend buying a ground bar if not already included with your tent which will ensure the sides stay evenly spaced.
Place bricks just inside the four corners of the tent, digging out grass, and using soil and/or sand to ensure that they are level.
Use the spirit level to make sure that all the stones are level. You should check that the blocks are level with a string stretched between the corner stones.
Now lay the stones, keeping a distance of about 60 cm between them.
Once all stones are level, a waterproof membrane can be placed under the blocks. This will protect the wooden floor but also the concrete blocks that will otherwise absorb water and deteriorate over time.
Again, the string helps to ensure that all the blocks are at the same height.
Lay down your rubber support pads on top of the blocks to reduce friction between the concrete blocks and the wood joists.
Lay the wood joists on top of the masonry blocks, leaving a distance of 10-15cm to the tarpaulin so that condensation from the tarpaulin doesn’t reach the wood.
Spread the chipboard over the rafters and screw it down. Caution: Measure and plan the distribution of the boards beforehand so that the overhang of each chip board is minimised. Top tip: If necessary, you can use a rubber mallet to help ensure that all the panels fit tightly together.


Step-by step guide: A DIY tent floor with pallets and chipboard
Using pallets as a foundation allows you to achieve ventilation and offers enough support for the chipboard. It can be set up relatively quickly and will certainly suffice for a garden wedding or other event.
Photos in this post of the pallet and chipboard floor are from a Martial arts group in Germany, who constructed flooring for a temporary Dojo.
You should plan again for a floor area that allows for 10-15cm to the walls, so that moisture isn’t transferred from the tent walls to the chipboard or timber foundation.
Materials you'll need
- Sand
- Pallets
- Chipboard
- Spirit level
- String
- Hand-held circular saw
- Cordless drill & screws
- Rubber mallet
- Painter’s fleece
- if necessary laminate to cover
Detailed instructions for building the chipboard floor with a pallet foundation
Set up your tent making sure that the corners of the tent are at right angles.
Flatten the surface by filling in any holes in the floor with sand.
Lay out the pallets and, if necessary, check with a spirit level and string (stretched between the corner pallets) that all the boards are at the same height.
Screw the pallets together. Check once more to ensure that they remain level.
Spread the chipboards on the pallets and screw them tight as well. If necessary, you can use a rubber mallet to help ensure that all the boards fit tightly together.
The chipboards can be covered with carpet, if you wish.
The right floor for your tent
There is the right flooring solution for every tent if the bare earth or grass in your garden isn’t sufficient. This solution must fit the need (e.g. party / storage of agricultural equipment) as well as the outdoor space (e.g. wet lawn / uneven garden) and the duration of use (summer / winter / whole year). Various materials and types of construction are available for this – from plastic mats to chipboard. We wish you every success with your tent floor!
Are you still unsure, would you like information on prices or are you still looking for the right tent floor for you? Let our expert customer service advise you by phone on +4401183150873 or send us an e-mail at [email protected].

Brett
Editor
Hi, I'm one of the editors of this magazine.
I love my job and especially like to tell you about the advantages of our tents and accessories. In my articles I give you tips on how to make your next birthday party a success, ideas on how to arrange your garden and all the possible uses of our marquees, gazebos and garden products.
You may also be interested in:


